
How to Design a Stand-Up Pouch with Window Without Compromising Strength or Shelf Life?
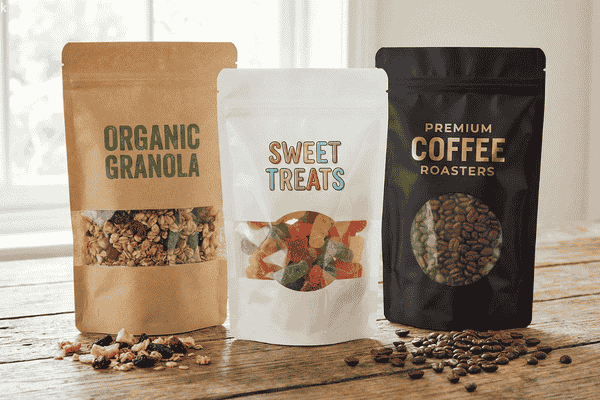
I love stand-up pouch designs with windows; they quickly build consumer trust. But I hate seeing that trust crumble after shipping due to leakage or deformation.
A stand-up pouch with a window can protect strength and shelf life when the window is treated as an engineered zone, not just a graphic choice. Proper placement, compatible materials, and verified sealing settings prevent leaks, deformation, and barrier loss.
I will walk you through how I decide why the window is worth it, where it should sit, and how to keep it clear without sacrificing barrier or line stability.
Why Do We Need the Window on the Stand-Up Pouch?
I used to think windows were only “nice to have,” until I watched how quickly shoppers trust products they can see, especially online.
Windows help shoppers reduce doubt by allowing them to visually inspect the product, which often increases perceived freshness and naturalness. The trade-off is that a window can weaken stiffness and barrier unless it is engineered with the right materials, geometry, and testing plan.
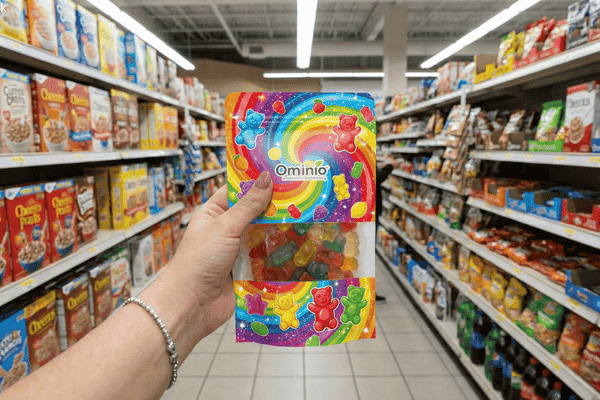
Buyers cannot touch, so they “touch with their eyes”
I keep one rule in my head: people are visual. When they cannot touch a product, they create a mental touch from what they see. That is why “implied touch” matters in packaging.
When I review a snack pouch, a coffee pouch, or a pet treat pouch, I ask: What does the window help the buyer believe?
- “The nuts look whole and premium.”
- “The granola looks fresh, not dusty.”
- “The pet treats look real, not artificial.”
I have also noticed something practical on e-commerce pages. Rough-looking textures (like kraft-style visuals) plus soft, organic shapes can make products feel more “healthy” in the buyer’s mind. Smooth, glossy looks can push the product toward a “sweet” or “treat” signal. A window strengthens this effect because it adds proof.
The business reason windows stay popular, even when they cost more
From a marketing view, it makes sense why brands accept a higher unit cost. A window can reduce perceived risk. It can lift conversion. It can lower returns. That is a real financial gain.
But I never approve a window just because it “looks premium.” I approve it when the pouch still survives:
- filling impact
- shelf stacking
- drop and vibration
- humidity swings
- seal integrity targets
My decision matrix for “window or no window”
| Decision factor | When I push for a window | When I advise against it | What I do instead |
|---|---|---|---|
| Product appearance drives purchase | Premium nuts, trail mix, colorful candies, dried fruit | Powdery products that look “messy” | Use high-res texture photos on PDP, smaller window |
| Shelf life is sensitive | Only with high-barrier clear materials | Long shelf life + harsh export routes without budget | Use partial window + opaque barrier back panel |
| Filling line speed is high | Only if seal settings are stable | If seal drift or contamination is frequent | Use smaller window and wider seals |
| Brand story needs proof | Natural, “real ingredient” claims | If product is visually inconsistent batch to batch | Use window only on back panel or add image proof |
If you want to see the common pouch formats we build this around, I usually start from A standard SUP base and then design the window “safe zone” on top of it.
Where Should We Place Windows to Maintain Structural Integrity and Seal Strength?
I have seen the same pattern again and again: the window was not the problem—the placement was.
Window placement determines whether seals stay uniform and whether panels stay stiff under product load. The best designs keep the window away from hermetic seals, zipper ends, gusset transitions, and high-stress corners, while using rounded shapes to avoid tear initiation.
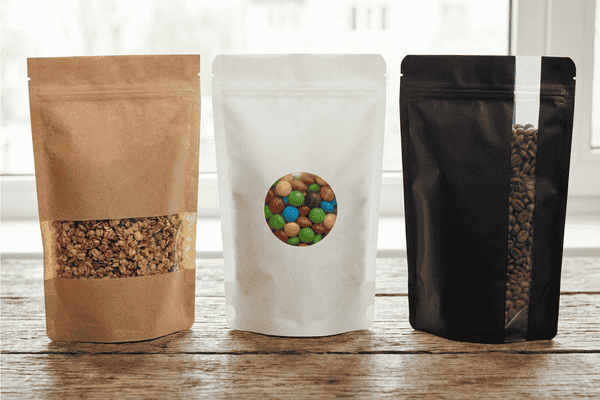
The three “no-window zones” I enforce
1) No window near hermetic seals
I keep the window perimeter away from the side, bottom, and zipper seals. If the sealing jaws meet at mixed thicknesses or materials, the pressure becomes uneven. That is how micro-channels form.
2) No window near zipper ends
Zipper ends are already sensitive. If the window reduces stiffness nearby, it increases peel risk, and it can trigger leaks during repeated open-close use.
3) No window across gusset transition lines
The gusset is where a pouch becomes a stand-up pouch. That area flexes a lot. If a window edge sits there, it becomes a crack starter after transport or repeated handling.
Window shape is a strength decision, not a design taste
I avoid sharp corners because sharp corners concentrate stress. Even if the film is strong, a sharp corner behaves like a tiny tear notch. When a pouch drops on a corner, the force focuses there.
So I push designers toward:
- rounded rectangles
- ovals
- smooth curves with generous radii
The sealing truth many teams ignore
Many teams test barrier on flat film samples and feel safe. I do not. I care about finished pouch performance.
A pouch can pass flat-film OTR data and still fail in real life because:
- seals are weak
- seals are contaminated
- seal pressure is uneven
- the window edge distorts the jaw contact
Table 2: Placement rules that prevent 80% of window failures
| Design point | What I specify | Why it prevents failure |
|---|---|---|
| Distance from any hermetic seal | Keep a safe margin from side/bottom/zipper seals | Avoids thickness transitions that create leak channels |
| Window corner radius | Use generous rounded corners | Reduces crack initiation during drops and vibration |
| Window height on heavy products | Avoid very tall windows | Reduces belly-out and shelf slump |
| Window near gusset folds | Keep window edges off gusset transition | Reduces flex-cracking and deformation |
| Window near zipper ends | Keep extra clearance | Protects the most sensitive leak zone |
When teams want a bigger “see-through window pouch” for marketing, I usually answer like this: make it bigger only after you widen seals and confirm stiffness. Otherwise, the design looks good once, then costs money for months.
How Do We Balance Visibility, Barrier Protection, and Anti-Fog Performance?
I have watched brands win sales with visibility, then lose reputation because fogging and barrier loss made the pack look cheap.
The best balance uses “just enough” window area, high-barrier clear materials when shelf life demands it, and anti-fog only when storage conditions create condensation. Validation should be done on formed pouches after flex, drop, and sealing stability checks.
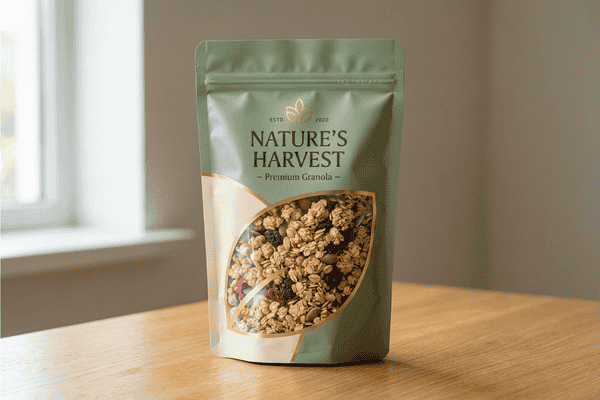
First, define what the window must prove
I ask one question before picking materials: what does the window need to prove to the buyer?
- “Contents are whole and premium.”
- “No broken chips.”
- “Fresh roast color.”
- “No clumping.”
Most of the time, a smaller window can prove enough. Bigger windows cost more because they raise engineering demands.
Barrier strategy options (what I would choose)
Option A: True “cut-out” window on metallized film (demetallized area)
This looks premium, but it can destroy barrier in the window zone if it is not backed by a clear barrier layer. I only use it when the product is not extremely sensitive or when we add a high-barrier clear support web.
Option B: Full clear high-barrier front web (the window is unprinted)
This is often the safest build. The barrier stays uniform. Tension mismatch is lower. The “Stand up pouch with clear window” becomes a print choice, not a material weak spot.
Option C: EVOH-based clear structures
EVOH can be excellent for oxygen barrier, but humidity can reduce its performance. If the pouch is sold in hot, humid regions, I am careful. I do not assume lab values match real distribution.
Anti-fog is a tool, not a decoration
Anti-fog helps when:
- the product releases moisture
- the pack faces temperature swings (warehouse to cold room)
- condensation fogs the window and makes the product look stale
But anti-fog can also change slip, sealing behavior, or optical clarity if the wrong coating is used. That is why I only specify it after a simple route simulation:
- storage temperature range
- humidity range
- handling time before purchase
Table 3: Common production-line issues with high-barrier + anti-fog window structures
| Problem on line | What usually causes it | What I do to fix it |
|---|---|---|
| Seal leaks increase after adding window film | Different SIT (seal initiation temperature) or thickness change | Re-tune seal temp/dwell/pressure; widen seals near window zone |
| Film wrinkles near window area | Tension mismatch between webs, poor unwind control | Adjust tension curve; improve web guiding; use matched modulus films |
| Fogging still happens | Anti-fog spec is wrong for temperature swing | Switch coating type; test in real temperature cycle; reduce window size |
| Window hazy or “silvering” | Adhesive wet-out not stable, or trapped air | Optimize lamination temperature/viscosity; improve nip pressure control |
| Barrier drops after shipping | Micro-cracking in coated barrier layer | Add protective topcoat; reduce converting tension; validate with flex testing |
My simple but strict validation plan
I do not rely on paper specs alone. I validate with:
- seal strength (peel and burst)
- leak testing (dye or vacuum bubble)
- OTR/WVTR on the finished pouch, not only flat film
- drop + vibration, then re-check barrier and leaks
- window clarity check after route simulation
If you want me to review your design quickly, I normally ask for: product weight, filling method, target shelf life, and storage climate. That is enough to give a structural direction without wasting weeks.
Before you finalize your design, you can also seek our free consultation service to see if the stand-up pouch with a window can be used in your project. Simply click “contact” in the upper right corner.
Conclusion
Using packaging bags with windows can greatly increase customer trust, but poor design can easily cause the packaging to lose its most basic function: protecting the product. We recommend that, when designing packaging, you consider the materials used and the window placement to mitigate this risk.
External links:
- ASTM D3985 (OTR test method): https://www.astm.org/d3985-05r21.html
- ASTM F1249 (WVTR test method): https://www.astm.org/f1249-20.html
- Research overview on transparency and perceived risk in food packaging / online purchase context: https://www.sciencedirect.com/science/article/pii/S0950329319301688